Table of Contents
Introduction
Have you ever needed to check what motherboard you have in your computer? Maybe you’re looking to upgrade your components, or you need to troubleshoot a hardware issue. Whatever the reason, it’s easy to find out with just a few simple steps. In this blog post, we’ll show you how to check what motherboard you have in your computer.
5 Ways to Check What Motherboard You Have
1. Check Physically on the Motherboard
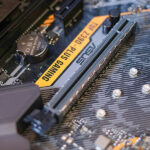
If you’re comfortable opening up your computer case, that’s a great way to go. Just make sure your computer is powered off and unplugged for safety. Once you have the case open, take a look at the motherboard itself. You’ll often find the model number printed right on the board, usually near the CPU socket or the RAM slots. It might be a bit small, so you might need a flashlight to see it clearly.
2. Using System Information in Windows
You can check the motherboard information right from Windows. Just press the Windows + R keys together to open the Run dialog. Type in msinfo32 and hit Enter. This will bring up the System Information window. Here, you can look for entries like ‘System Model’ or ‘BaseBoard Manufacturer’ and ‘BaseBoard Product.’ This will give you the details you need without any hassle.
3. Using Command Prompt
Another quick way is to use the Command Prompt. Just type cmd in the Windows search bar and open it up. Once you’re in, type this command: wmic baseboard get product,Manufacturer,version,serialnumber and hit Enter. This command will pull up all the relevant details about your motherboard, including the manufacturer, model number and serial number.
4. Using Third-Party Software
there are some great third-party tools out there. For instance, you can download CPU-Z, which is a free utility that gives you a ton of information about your system, including the motherboard model. Another option is HWiNFO, which provides a comprehensive overview of your hardware. Both are easy to use and the second one can give you a lot of insights at a glance.
5. Check the BIOS/UEFI
You can check the BIOS or UEFI settings. Just restart your computer and during the boot-up process, you’ll need to press a specific key—usually Delete, F2, or something similar, depending on your system. Once you’re in the BIOS, you should see the motherboard model listed on the main screen or in the system information section. Just be careful not to change any settings unless you know what you’re doing!.
Conclusion
Checking what motherboard you have in your computer is a simple process that can be done in just a few steps. You can easily find out the name and model number of your motherboard by following the instructions outlined in this blog.
FAQs
Q: Why do I need to know what motherboard I have?
A: Knowing what motherboard you have can help you make informed decisions about upgrading or replacing your computer’s components, or troubleshoot any hardware issues that may arise.
Q: Can I find out what motherboard I have without opening my computer case?
A: Yes, you can use software tools like System Information or CPU-Z to find out what motherboard you have without opening your computer case.
Q: How do I find out what chipset my motherboard has?
A: You can use a third-party tool like CPU-Z to find out what chipset your motherboard has. After downloading and installing the program, run it and click on the “Mainboard” tab. The chipset will be listed under the “Southbridge” section.
Q: How do I find out what BIOS version my motherboard has?
A: You can use a third-party tool like CPU-Z to find out what BIOS version your motherboard has. After downloading and installing the program, run it and click on the “Mainboard” tab. The BIOS version will be listed under the “BIOS” section.
If you found this post helpful, please like and share it with your friends!


